For a while now I’ve been wanting to add (at the very least) a switch in my shack to give me more connectivity, however I haven’t got a spare one (well I didn’t, I have now)… the wi-fi in the shack is crap too as it’s the other end of the house to the modem / router / wi-fi point (the east wing ha ha ha) and with granite concrete block walls it’s a battle for the waves to make it there…
Luckily (or depending on how you look at it unluckily) the modem / router at work decided to give some jip – to save messing around we put a new one in so I have a spare now…
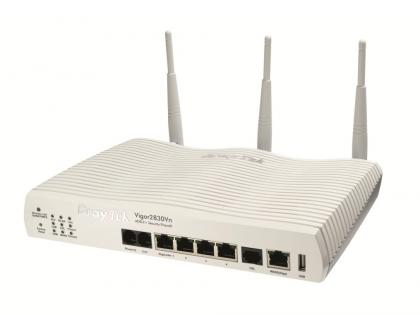
The DrayTek Vigor 2380n V1 (single band) is a nice little router and wasn’t cheap either when new so I wasn’t going to just bin it – Hoping that a factory reset & a firmware update would help I did the aforementioned and updated it…
Now the task of connecting in to the network and making a new wi-fi zone for the ‘east wing‘ 😉
I struggled here – for those without any networking knowledge like me there are so many settings that I really didn’t have a clue what I was looking at… enter the assistance of twitter and me asking dumbarse questions… well I don’t think they are stupid questions but I’m sure those with the knowledge will…
The advice given is very simple… and if you want to do it too you wont go far wrong following the basic details below…
FIRST – there will be a small hole on the front of the router (yours may be elsewhere) which has the word “reset” above / below it – switch the router on (no wire connections other than power) and allow it to boot up – give it a minute or so, then put a paper clip in the hole and press gently – this will reset the router to factory settings…
FIRMWARE – find and download the latest firmware update for your router…
THEN – you will need to connect the new router (that’s going to be the new zone) via a network cable with the RJ45 connectors to your computer / laptop
NEXT – you will need to access the router and you do that through your web browser – in the address bar type the routers main IP address, usually its 192.168.1.1 (or I have also seen 192.168.0.1) – then you should see a login screen which will require a user name & password and again a lot of the time it will be “admin” – “admin” – however on the bottom of the router it sometimes shows the factory settings – if it doesn’t then when you do find them and get in or change anything then make a note and add the details to the bottom of the router for another day (if you are anything like me you are bound to forget eh!)
UPDATE FIRMWARE – best you do this now before doing anything – check the process for your specific router.
now on to the changes…once the firmware has been updated and you have logged in to the router do the following…
DISABLE DHCP SERVER – this is so the main router that the new router will be connected to is the one dishing out the IP addresses and thus no conflict between them trying to assign IP addresses which are the same elsewhere which will / can cause issues.
ENABLE BRIDGE MODE (assuming it has it) – the Vigor has bridge mode however on an old TP-LINK my Dad had we couldn’t find it – the UI wasn’t very easy and we gave up to make it a job for another day.
SET UP THE WI-FI – choose a different SSID (that’s the name you will see on your available wi-fi list when searching) and then obviously a password (assuming you aren’t daft)!
CHANGE THE ROUTERS MAIN IP ADDRESS – this is where some complications may occur, luckily for me @PE2KM sent me the following link… https://www.cnet.com/how-to/how-to-turn-an-old-wi-fi-router-into-an-access-point/ which explained very clearly what was happening and what I needed to do – in fact it explains the whole process in much more detail than I do here however the basics are above – use both and you shouldn’t go far wrong – I had a bit of faffing about, I think part of the problem was not using the LAN port to do the programming of the router (port #1 out of 4x) – once I had set it up as per above through #1 and then connected the main router to port #1one AFTER the configuration it all seemed to work fine – no issues… happy days!
helpers, thank you tweeps – @g8vhl – @jviddy – @bakeliteboy – @g0lfp – @PE2KM